
Burnt Basque Cheesecake: A Creamy, Caramelized Delight


This post may contain affiliate links. Please see my Disclosure, Privacy and Terms of Use for more information.
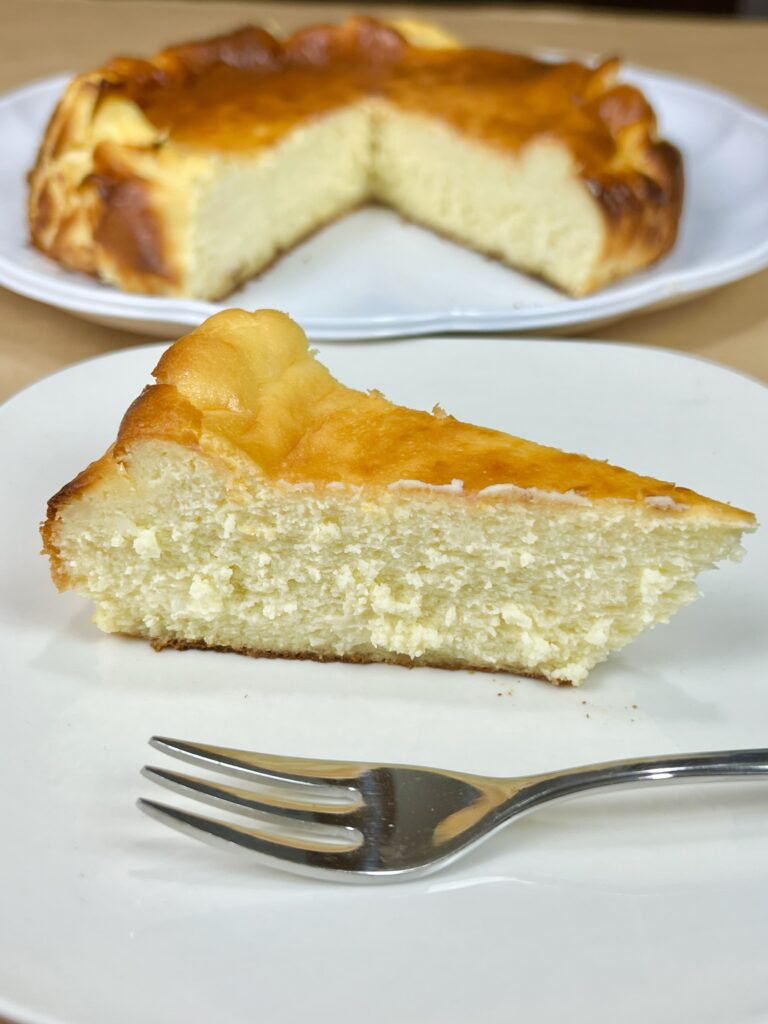
Imagine a cheesecake that’s creamy, rich, and unapologetically burnt on top, creating an irresistible caramelized crust that complements its custard-like center. The Burnt Basque Cheesecake, originating from the Basque region of Spain, has become a global sensation — and for good reason. Its rustic charm, simplicity, and show-stopping flavor make it the perfect dessert for any occasion.
But what makes this cheesecake so special? Its simplicity. Unlike traditional cheesecakes, this one doesn’t require a crust or water bath. Instead, it bakes at a high temperature, which gives it a signature cracked, burnt exterior and creamy, almost gooey center.
Why You’ll Love Making Burnt Basque Cheesecake
This cheesecake is beginner-friendly, forgiving, and irresistibly delicious. Unlike traditional cheesecakes, you don’t have to worry about cracks or a perfect finish — the imperfections are part of its charm! The high baking temperature creates a caramelized crust while leaving the center luxuriously soft and creamy.
A Bit of Basque Cheesecake History
The Burnt Basque Cheesecake hails from San Sebastián, a city in Spain’s Basque region renowned for its culinary excellence. This dessert first emerged at La Viña, a restaurant where chef Santiago Rivera created the recipe in the 1990s. Little did he know that this humble, crustless cheesecake would take the culinary world by storm decades later. Its appeal lies in its imperfections — burnt edges, uneven cracks, and rustic presentation.
Tips for Perfecting Your Cheesecake
- Use Quality Cream Cheese: A good cheesecake starts with high-quality cream cheese. Look for full-fat varieties for the best texture and flavor.
- Room-Temperature Ingredients: Bring your eggs, cream cheese, and cream to room temperature for a smoother batter.
- Don’t Skimp on the Burn: The burnt top is essential! It not only adds flavor but also gives the cheesecake its unique character.
- Line Your Pan Generously: Use parchment paper that extends above the edges of your springform pan to prevent sticking and make removing the cheesecake easier.
Serving Suggestions
Serve your Burnt Basque Cheesecake as is for a rustic, no-frills dessert experience. For added flair, pair it with fresh berries, a drizzle of honey, or a dollop of whipped cream. Its creamy center contrasts beautifully with tart or sweet toppings.
❄️ Storage and Freezing
- Storage: Keep your cheesecake in an airtight container in the refrigerator for up to 3 days. Let it come to room temperature before serving for the best texture.
- Freezing: Basque Cheesecake freezes well. Wrap it tightly in plastic wrap and place it in an airtight container. Thaw in the fridge overnight before serving.
Fun Facts About Basque Cheesecake
- Despite its popularity, Burnt Basque Cheesecake is one of the easiest cheesecakes to make. No crust? No problem!
- Its imperfections are what make it perfect — no stress over cracks or smooth finishes!
- It’s a dessert that transcends seasons, ideal for cozy winter nights or summer gatherings.
A Slice Above the Rest
Burnt Basque Cheesecake is the epitome of effortless elegance. With its caramelized crust, creamy center, and no-fuss preparation, it’s a dessert that never fails to impress. Whether you’re new to baking or a seasoned pro, this cheesecake is a must-try. So grab your springform pan, preheat your oven, and get ready to fall in love with this Basque treasure.
Happy baking!


Burnt Basque Cheesecake: A Creamy, Caramelized Delight
Ingredients
- 16 oz cream cheese
- 1 cup + 2Tbsp sugar
- 1/2 cup greek yogurt
- 4 eggs
- 10 oz heavy whipping cream
- 1 tsp vanilla extract
- 3 tbsp flour
Instructions
- Preheat the oven to 400°F
- Add cream cheese and sugar together, beat until creamy.
- Next add the yogurt and mix again.
- Mix in the eggs, adding one at a time, mixing each until incorporated.
- Scrap the sides of the bowl with a spatula. Mix in the vanilla extract and heavy whipping cream.
- With a sifter, sift the flour onto the mixer and using a spatula gently fold in the flour.
- Lightly grease a 9 inch springform pan and line it with two sheets of parchment.
- Pour in your cheesecake mix, lightly tape the pan a few times on the counter to work out any air bubbles.
- Bake for 20 minutes, then turn the oven down to 375°F and bake for another 20-25 minutes.
- The cake will have a slight wiggle in the center. Once removed from the oven let it cool completly before removing the springform and parchment paper.
- Chill in the fridge for at least a hour so the cake can set.
- Enjoy!