Sourdough Discard Ciabatta Bread

Servings: 7 Total Time: 5 hrs 5 mins Difficulty: Beginner Corn Free Egg Free
sourdough discard cibatta rolls pinit

If you bake with sourdough, you know the struggle. Every time you feed your starter, you end up with a jar of discard and that little voice asking, “What am I going to do with all this?” Here’s my answer: these golden, crusty sourdough discard ciabatta rolls. They’re soft and chewy inside, crisp outside, and full of that gentle sourdough flavor.

Even better, you don’t need a super active starter or days of waiting. A little bit of yeast does the heavy lifting, so you can have fresh, homemade ciabatta on the table the same day. Perfect for sandwiches, dipping in olive oil, or soaking up soup.

Why You’ll Love This Recipe

This is one of my favorite ways to put sourdough discard to good use. Here’s why it’s a keeper:

  • No more wasted discard. Turn what you’d normally throw away into beautiful bread.
  • Ready the same day. A pinch of yeast means no overnight rise needed.
  • Only five ingredients. Discard, water, flour, yeast, and salt. That’s it.
  • No fancy shaping. You just cut the dough into rectangles. No rolling into balls or braiding.
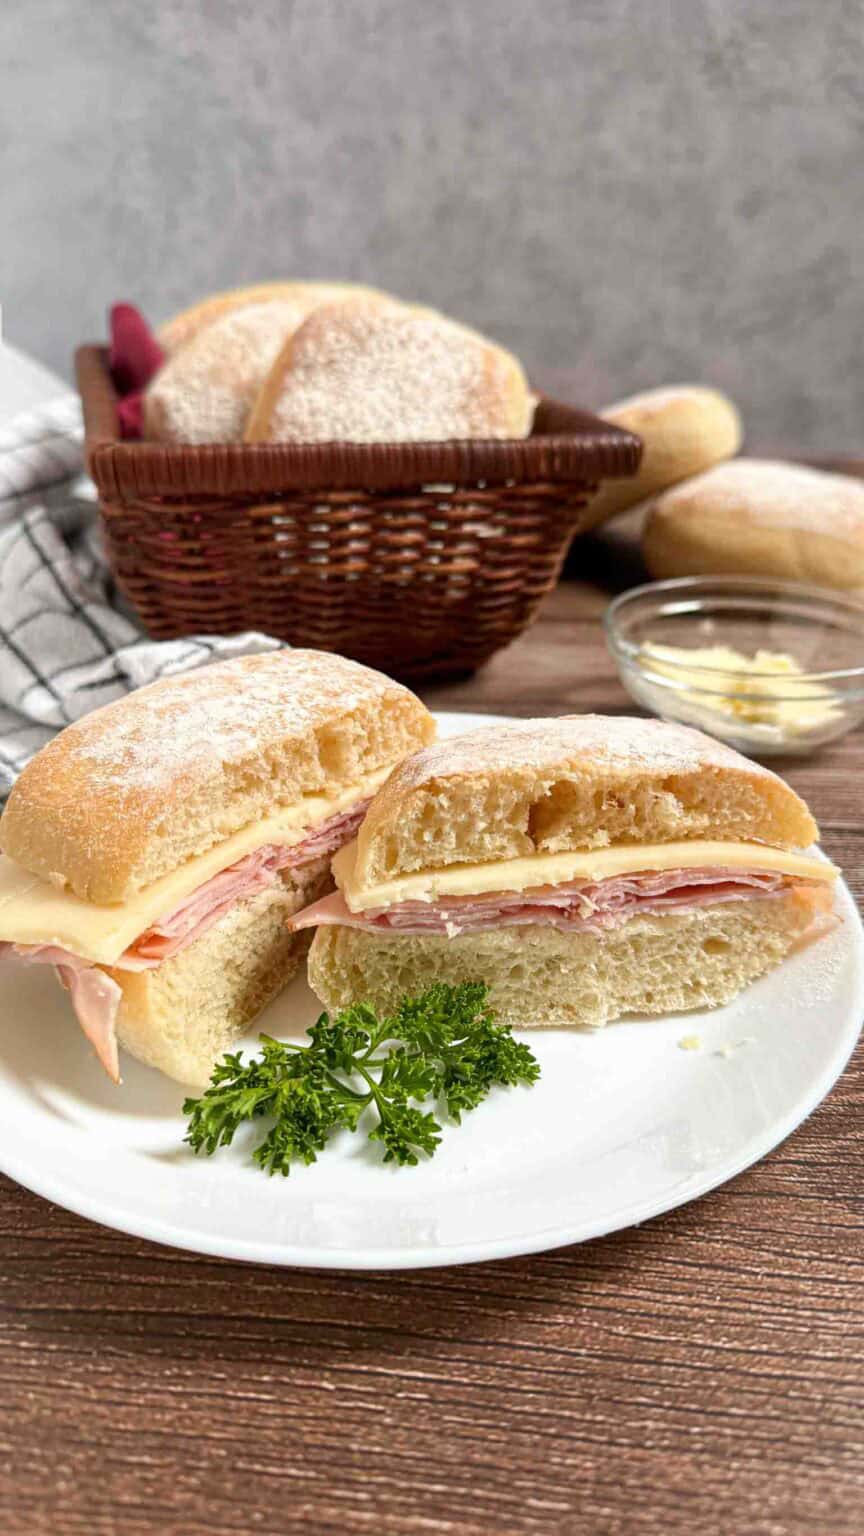
  • Perfect for sandwiches. The rectangle shape is just right for paninis, breakfast sandwiches, or a simple ham and cheese.

A Little Note From Me

After years of training and working in professional bakeries, I still get excited every time fresh bread comes out of the oven. Debbie Hauck - the face behind Debbies Kitchen CornerThere’s just nothing like it. In Germany, fresh rolls (we call them Brötchen) are part of everyday life. People stop at the bakery in the morning and bring home a bag of warm rolls for breakfast.

These ciabatta rolls remind me a lot of that. They’re simple, crusty, and best eaten the same day, ideally still a little warm with butter. And since I always seem to have a jar of sourdough discard in my fridge, this recipe gets made in my kitchen a lot.
What Is Ciabatta?

Ciabatta (say it like “chuh-BAH-tuh”) is an Italian bread known for its crisp crust and soft, chewy inside with airy holes. The name means “slipper” in Italian, because the flat, long loaves look a bit like a slipper.

Ciabatta is made with a wet, sticky dough. Instead of kneading it a lot, you use gentle stretches and long rests to build strength. This version uses sourdough discard for extra flavor and a little yeast to make sure it rises nicely every time.

Ingredients you need

This recipe is all about simple ingredients. Using a kitchen scale gives you the best results, since bread baking is all about exact amounts.

  • Sourdough discard: This is the extra starter you remove before feeding. It adds a mild, tangy flavor. It can be straight from the fridge or freshly removed from your jar.
  • Warm water: It should feel comfortably warm on your wrist, like a warm bath, not hot. Start with 250g and add more if the dough feels stiff.
  • Bread flour: Bread flour has more protein than all-purpose flour, which gives ciabatta its chewy texture and helps it hold its shape.
  • Yeast: A small amount of instant or active dry yeast makes sure the dough rises well, even if your discard isn’t very lively.
  • Salt: Adds flavor and helps make the dough strong. Don’t skip it!I

How to Make Sourdough Discard Ciabatta

This bread takes a few hours from start to finish, but most of that time is just the dough resting while you do something else. Here’s how to make it, step by step.

Step 1: Add the water. Pour the warm water into your mixing bowl.

Step 2: Add the discard. Gently pour the sourdough discard into the water. If your starter is active and bubbly, it may float on top, which shows it’s lively and full of air. If it sinks, don’t worry! The yeast in this recipe makes sure your bread still rises.

Step 3: Add the dry ingredients. Add the bread flour, salt, and yeast to the bowl.

Step 4: Mix the dough. Mix with the dough hook on your stand mixer for 3 to 5 minutes, until everything comes together into a soft, sticky dough. No mixer? Mix by hand with a sturdy spoon or your hand until no dry flour remains.

Step 5: First rise. Move the dough into a lightly oiled bowl. Cover it and let it rest for 1 to 1 ½ hours.

Step 6: Stretch and fold. With wet hands, grab one side of the dough, gently stretch it up, and fold it over the top. Turn the bowl a quarter turn and repeat until you’ve gone all the way around (4 times). This helps make the dough stronger without kneading.

Step 7: Second rest. Cover the bowl again and let the dough rest for another 2 hours. It should be puffy and full of bubbles.

Step 8: Shape the dough. Lightly flour your counter and gently tip the dough out. Carefully press or roll it into a rectangle about 14 inches by 10 inches. Be gentle so you don’t push out all the air bubbles.

Step 9: Cut the rolls. Using a dough scraper or sharp knife, cut the dough into 7 to 9 rectangles of about the same size.

Step 10: Final rise. Place the rolls on a baking sheet lined with parchment paper, leaving space between them. Cover with a clean dish towel and let them rise until they’re about doubled in size.

Step 11: Heat the oven. While the rolls rise, preheat your oven to 450°F.

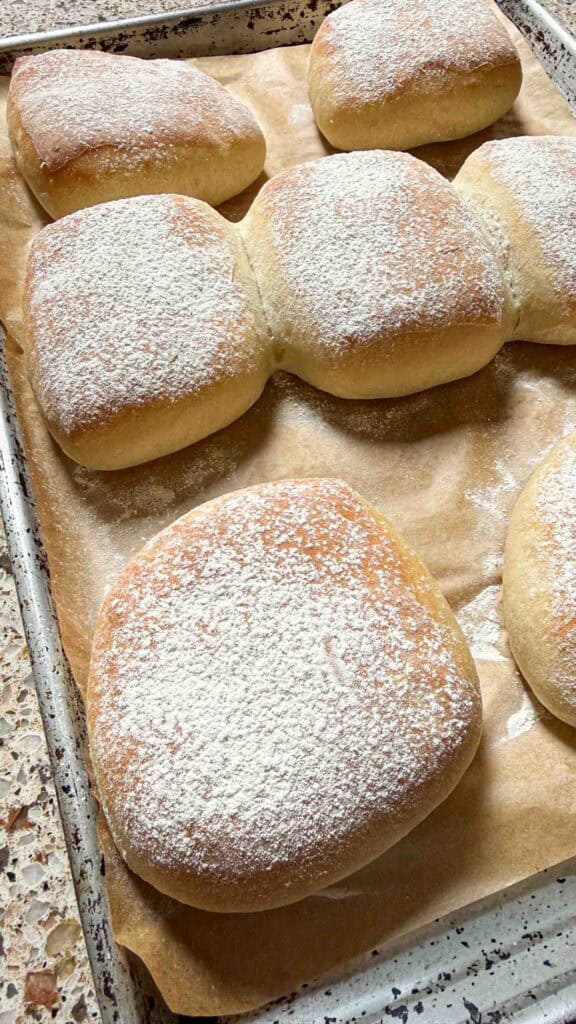
Step 12: Dust and bake. Lightly dust the tops of the rolls with flour. Bake for 12 to 15 minutes, until golden brown and crusty.

Step 13: Cool. Move the rolls to a wire rack and let them cool before slicing. This keeps the bottoms from getting soggy.

👩🏻‍🍳 Debbie’s Tip

Use wet hands, not more flour. Ciabatta dough is supposed to be sticky. It’s tempting to add extra flour, but that makes the bread heavy and dense. Instead, dip your hands in water before you stretch and fold. The dough won’t stick to wet hands, and your rolls will stay light and airy.

Variations & Substitutions

Once you’ve made the basic recipe, try mixing things up:

  • Herb ciabatta: Add 1 to 2 teaspoons of dried Italian herbs or rosemary to the flour.
  • Cheesy ciabatta: Sprinkle shredded Parmesan on top before baking.
  • One big loaf: Skip cutting the rolls and bake the dough as one or two long loaves. Add a few extra minutes to the bake time.
  • Garlic ciabatta: Brush the warm rolls with melted garlic butter right after baking.

Storage & Freezing

Ciabatta is best on the day it’s baked, but it keeps well with a little care.

  • Room temperature: Store in a paper bag or bread box for up to 2 days. Plastic bags make the crust soft.
  • Re-crisp: Warm rolls in a 350°F oven for about 5 minutes to bring back the crunchy crust.
  • Freeze: Let the rolls cool completely, then put them in a freezer bag. Freeze for up to 3 months. Reheat straight from the freezer at 350°F for 8 to 10 minutes.

Frequently Asked Questions

Here are the questions I get most about this ciabatta bread.

1️⃣ Can I use active sourdough starter instead of discard?
Yes! Active starter works great and may even give you a little more rise and flavor.

2️⃣ Do I really need the yeast?
For this recipe, yes. Sourdough discard usually isn’t strong enough to rise bread on its own. The yeast makes sure your rolls rise every time.

3️⃣ Why is my dough so sticky?
That’s normal for ciabatta! Wet dough is what creates those soft, airy holes inside. Use wet hands and a dough scraper to make it easier to handle.

4️⃣ Can I use all-purpose flour instead of bread flour?
You can, but the rolls will be softer and a little less chewy. Start with the lower amount of water, since all-purpose flour soaks up less.

From My Kitchen to Yours

There’s something so rewarding about turning a jar of sourdough discard into a tray of golden, crusty bread. No waste, just warm, homemade rolls ready for your table. Slice one open while it’s still a little warm, add a swipe of butter, and enjoy every crunchy, chewy bite.

Enjoy every bite,
Debbie

Sourdough Discard Ciabatta Bread

Difficulty: Beginner Prep Time 20 mins Cook Time 15 mins Rest Time 4.5 hrs Total Time 5 hrs 5 mins
Cooking Temp: 450  F Servings: 7
Best Season: Suitable throughout the year

Description

These easy sourdough discard ciabatta rolls have a crisp crust and soft, chewy inside. Made with five simple ingredients and ready the same day.

Ingredients

Cooking Mode Disabled

Instructions

  1. Add water and discard: Pour the warm water into a mixing bowl, then gently add the sourdough discard.
  2. Add dry ingredients: Add the bread flour, salt, and yeast.
  3. Mix: Mix with a dough hook for 3 to 5 minutes until a soft, sticky dough forms.
  4. First rise: Place the dough in a lightly oiled bowl, cover, and let rest for 1 to 1 ½ hours.
  5. Stretch and fold: With wet hands, stretch one side of the dough up and fold it over. Turn the bowl and repeat 4 times total.
  6. Second rest: Cover and let rest for 2 more hours, until puffy and bubbly.
  7. Shape: Turn the dough onto a floured counter and gently press or roll into a 14 x 10-inch rectangle.
  8. Cut: Use a dough scraper to cut 7 to 9 equal rectangles.
  9. Final rise: Place on a parchment-lined baking sheet, cover with a dish towel, and let rise until doubled.
  10. Preheat: Heat the oven to 450°F.
  11. Bake: Dust the tops with flour and bake for 12 to 15 minutes, until golden and crusty.
  12. Cool: Cool on a wire rack before slicing.

Note

  • Use a kitchen scale for the best results.
  • Start with 250g water and add more only if the dough feels stiff.
  • Wet your hands instead of adding extra flour when handling the dough.
Keywords: sourdough discard ciabatta, sourdough discard bread, ciabatta rolls, sourdough discard recipes, same day sourdough bread, homemade ciabatta, ciabatta sandwich rolls

Rate this recipe
Did you make this recipe?

Tag @debbieskitchencorner on Instagram and hashtag it #debbieskitchencornerrecipes so we can see all your recipes.

Pin this recipe and share it with your followers

pinit
Recipe Card powered by WP Delicious
Debbie Hauck - the face behind Debbies Kitchen Corner
Debbie Hauck Video and Food Content Creator

Hi, I am Debbie, a full-time YouTuber and Food Content Creator. I live in the Monmouth Oregon  with my family. Love traveling, sharing new recipes and hanging out with my kids.

Rate this recipe

Your email address will not be published. Required fields are marked *

Rate this recipe


Add a question

Your email address will not be published. Required fields are marked *


Min
Share it on your social network