Almond Bear Claw with Puff Pastry
Description
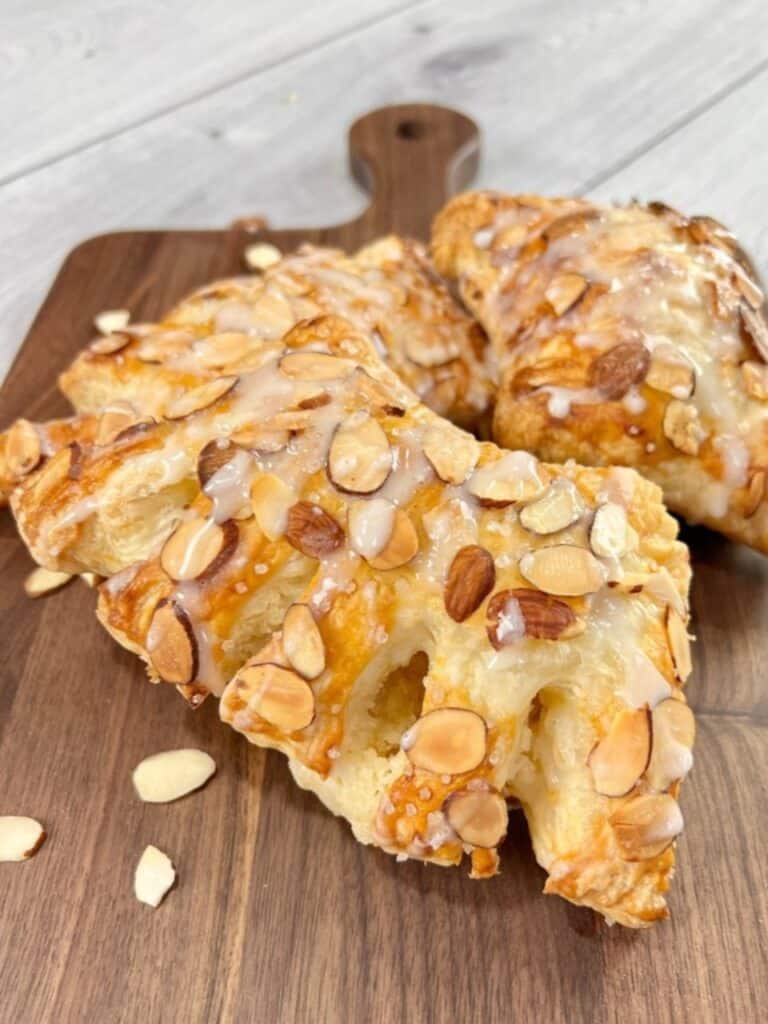
A bear claw is a flaky, buttery pastry filled with almond paste and topped with sliced almonds and a sweet glaze. Its rich, nutty flavor pairs perfectly with a hot cup of coffee or a creamy chai latte. For a refreshing twist, try it with a tall glass of cold brew or iced tea.
Ingredients
Toppings
Icing
Instructions
Pastry
-
-
Preheat oven to 400° F
-
-
Break up your almond paste into smaller chunks and add it to your food processor. Add the butter and sugar and mix and combine.
-
Crack the egg and put it in a small, separate bowl, and lightly beat it with a fork. Add half of the beaten egg to your almond mixture. Set the other half aside for brushing the pastry before it goes into the oven.
-
Then add the flour and mix the almond paste mixture again so the paste is smooth. Use your spatula to scrape the sides to make sure the ingredients are well combined.
-
On a floured surface, unroll one of your pastry sheets. You should see two, fold line indentions, that separate the dough into three even sections. Cut the dough along those perforated lines so you have three long pieces of puff pastry.
-
Keep one of the long pieces of puff pastry in front of you and set the other two aside. Spread about two tbsp of the almond paste on half of the pastry piece in front of you. Fold over the bare half of puff pastry so it's on top of the half with almond paste. Use a fork to crimp the edges, like a pop tart. Make sure it's sealed well. Repeat this step with each sheet of puff pastry dough.
-
Make four even cuts, from the center of your Bear Claw all the way to the crimped edge. Cut all the way through your pastry. Gently pull the cuts apart to make a curved, claw shape.
-
Line your baking sheet with parchment paper and lay your bear claws on it.
-
Brush the leftover beaten egg on the top of each Bear Claw.
Toppings
-
Sprinkle sliced almonds and coarse sugar (if you have it) on top of each Bear Claw.
-
Bake for 16-18 minutes. Set your Bear Claws aside to cool.
Icing
-
Whisk powdered sugar, milk, and vanilla extract in a small bowl until it's runny and smooth for drizzling.
-
When your Bear Claws are cooled, use a spoon to drizzle the icing over the top of your pastries in a zigzag pattern. And enjoy!
Nutrition Facts
Servings 6
- Amount Per Serving
- Calories 529kcal
- % Daily Value *
- Total Fat 24.9g39%
- Saturated Fat 5.1g26%
- Cholesterol 56mg19%
- Sodium 90mg4%
- Potassium 259mg8%
- Total Carbohydrate 62g21%
- Dietary Fiber 3.3g14%
- Sugars 40.2g
- Protein 10.2g21%
- Calcium 151 mg
- Iron 2 mg
- Vitamin D 6 IU
* Percent Daily Values are based on a 2,000 calorie diet. Your daily value may be higher or lower depending on your calorie needs.


User Reviews
This is the best and only recipe that I use. The pastries come out perfect every time and they are so much better than anything you can buy from the store.
Made these this morning and they were incredible! Will make again! And again 🙂
I am glad you love them. They are my favorite as well 😁
What brands do you use for the puff pastry & the almond paste?
Hi Mittie,
for the Puff Pastry I use Pepperidge Farm and the Almond Paste I usually make myself. I have not posted the blog for the almond paste recipe, but will do this shortly.
Here are the ingredients:
1 1/2 cups almond flour
1 1/2 cups powdered sugar
2 teaspoons almond extract
1 egg white (slightly beaten)
You also what the step by step video here:
https://www.youtube.com/watch?v=REa60ttgaZA
If you rather want to purchase it Walmart and Safeway have Odense Almond Paste.
I hope that helps! Let me know if you need anything else!