Print Options:

The Buttermilk Waffle: Crispy Edges, Fluffy Bliss

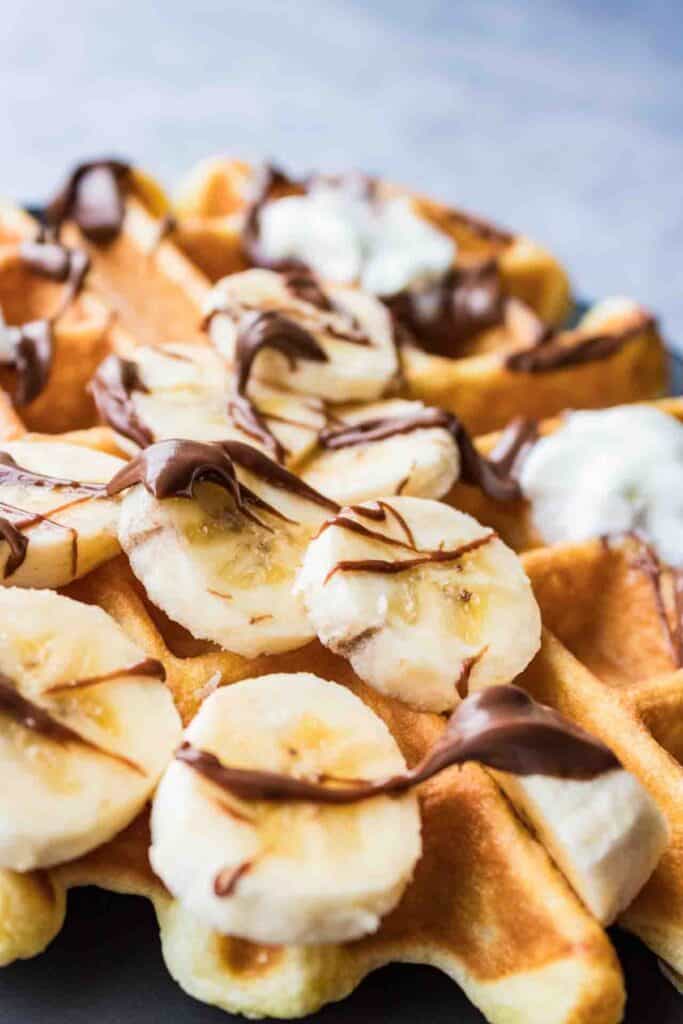
Waffle topped with banana slices, Nutella and whipping cream

There’s something magical about a plate of buttermilk waffles. The way the golden exterior promises a satisfying crunch, while the fluffy interior melts in your mouth like a buttery cloud, is pure breakfast heaven. Whether you’re a maple syrup purist, a fruit pile-on enthusiast, or someone who shamelessly adds whipped cream and Nutella, buttermilk waffles are your canvas for morning artistry.

A Little Waffle History

Waffles have been warming hearts for centuries. The earliest waffles date back to the Middle Ages, when they were cooked between two metal plates over an open flame. Buttermilk, though, brings a more recent twist. The tangy liquid—originally a byproduct of churning butter—has become a secret weapon in many bakers’ arsenals. Its acidity reacts with baking soda to create airy, fluffy waffles that rise like breakfast superheroes.


The Perfect Waffle—It’s All in the Buttermilk

Buttermilk isn’t just for texture—it brings a subtle tanginess that elevates the flavor to restaurant-level goodness. Pair it with a generous knob of butter melting into each little pocket, and you’ll find yourself in waffle nirvana.Quick Pro Tip: Don’t overmix your batter! Lumps are a sign of greatness. Overmixing leads to tough waffles, and nobody wants to chew their breakfast like gum. 

What If You Make Too Much Batter? (Is There Such a Thing?)

Waffle batter can hang out in your fridge for up to two days, but it’s best to use it within 24 hours for the fluffiest results. Store it in an airtight container to prevent it from soaking up fridge odors (because garlic waffles are nobody’s jam). Stir gently before use, as some ingredients may settle.

Want to keep the magic going for longer? Freeze your batter in portioned-out zip-top bags. Just thaw overnight in the fridge when the waffle craving strikes!

Storing Made Waffles—Because Who Eats Only One?

Waffles keep beautifully if stored right. Here’s how to make the most of your leftovers:
  1. Cool Completely: If you pack them up warm, condensation will turn them soggy (a waffle tragedy).
  2. Refrigerate for Short-Term: Store waffles in an airtight container in the fridge for up to 3 days.
  3. Freeze for Longer Love: Lay cooled waffles on a baking sheet in a single layer, freeze until firm, then transfer to a freezer bag. They’ll stay fresh for up to 3 months.

When reheating, skip the microwave—it’s a soggy waffle’s worst enemy. Instead, use the toaster or oven to revive that crispy exterior.

Can I Make the Batter in Advance?

Yes, but with a caveat: same-day mixing delivers the best rise and fluff factor. If you must prep in advance, mix the wet and dry ingredients separately. Combine them just before cooking, and you’re golden—literally.

📢 Fun Facts and Delicious Hacks

  1. Waffle Day: March 25th is International Waffle Day. Add it to your calendar (you deserve to celebrate).
  2. Savory Twist: Who says waffles can’t do dinner? Add cheese and herbs to your batter, then top with fried chicken or a poached egg. Mind. Blown.
  3. DIY Buttermilk: Out of buttermilk? Mix a tablespoon of lemon juice or vinegar with a cup of milk and let it sit for 5 minutes. Ta-da! Instant tangy goodness.
Cooking Method
Cuisine
Courses
Difficulty Beginner
Time
Prep Time: 10 mins Cook Time: 5 mins Total Time: 15 mins
Servings 6
Estimated Cost $  3
Best Season Suitable throughout the year
Description

Buttermilk waffles are fluffy, golden treats with a slight tangy flavor. They’re delicious topped with syrup, fruits, or whipped cream and can be served as breakfast, dessert, or even a savory meal with fried chicken or eggs.

Ingredients
  • 2 cups all purpose flour
  • 2 teaspoons baking powder
  • 1/2 teaspoons baking soda
  • 1/2 teaspoons salt
  • 2 eggs
  • 1 teaspoon vanilla extract
  • 2 cups buttermilk
  • 1/3 cup butter, melted
Instructions
  1. Add all dry ingredients into a mixing bowl and gently mix them together.

  2. Add 2 eggs into a smaller mixing bowl and beat them for about 30 seconds with a fork.

  3. Melt the butter and set aside to cool.

  4. Add buttermilk and vanilla extract to the eggs and mix until well combined.

  5. Once the melted butter has cooled a bit, add it slowly to the egg mixture. Mix with whisk.

    If the melted butter is still too hot the buttermilk could curdle.
  6. Pour the egg mixture into the flour mixture and fold together gently until no more dry flour is visible.

  7. Let stand for about 10 minutes so the batter can thicken a bit. In the meantime heat up your waffle iron.

  8. Spray waffle iron with butter spray on both sides. Take a scoop of batter and drop it into the middle of the waffle grid. Bake waffle for about 2-3 minutes or according to your waffle iron instructions.

Note

My favorite toppings: Whipped Cream, Nutella, Bananas, Blueberries, Strawberries, Powdered Sugar and Maple Syrup.

Keywords: buttermilk waffle, fluffy waffles, crispy waffle recipe, best waffle recipe, waffle breakfast ideas, homemade buttermilk waffles, waffle tips, buttermilk waffle storage, waffle history, perfect breakfast waffles
Debbie Hauck
Video Creator and Food Blogger

Hi, I am Debbie, a full-time YouTuber and Food Blogger. I live in the Salem Oregon area with my family. Love traveling, sharing new recipes and hanging out with my kids.

Thank you for sharing!